Custom Fields vs. Tags: How to segment your client database?
Carmel Granahan
July 16, 2024
5 min read


If you track something specific to your business, Custom Fields are a useful feature.
All CRMs have standard fields, such as the First and Last Name, Email Address, Phone Number, and so on.
Custom Fields are a fast and easy way to customize the CRM system to record extra data.
OnePageCRM has three categories of custom fields.
Custom fields for:
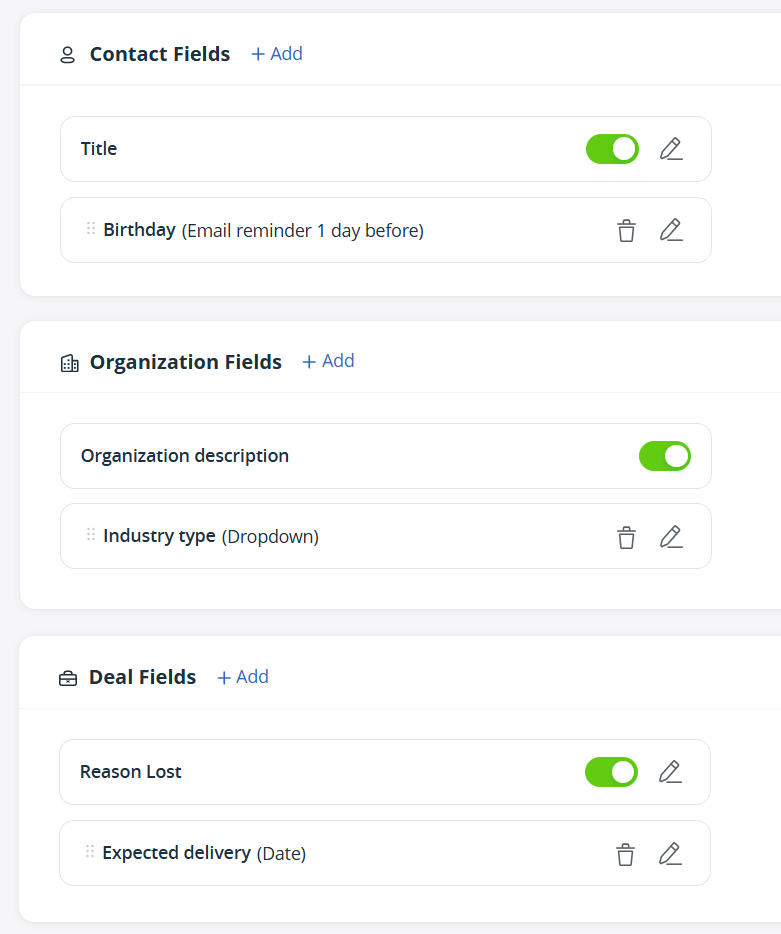
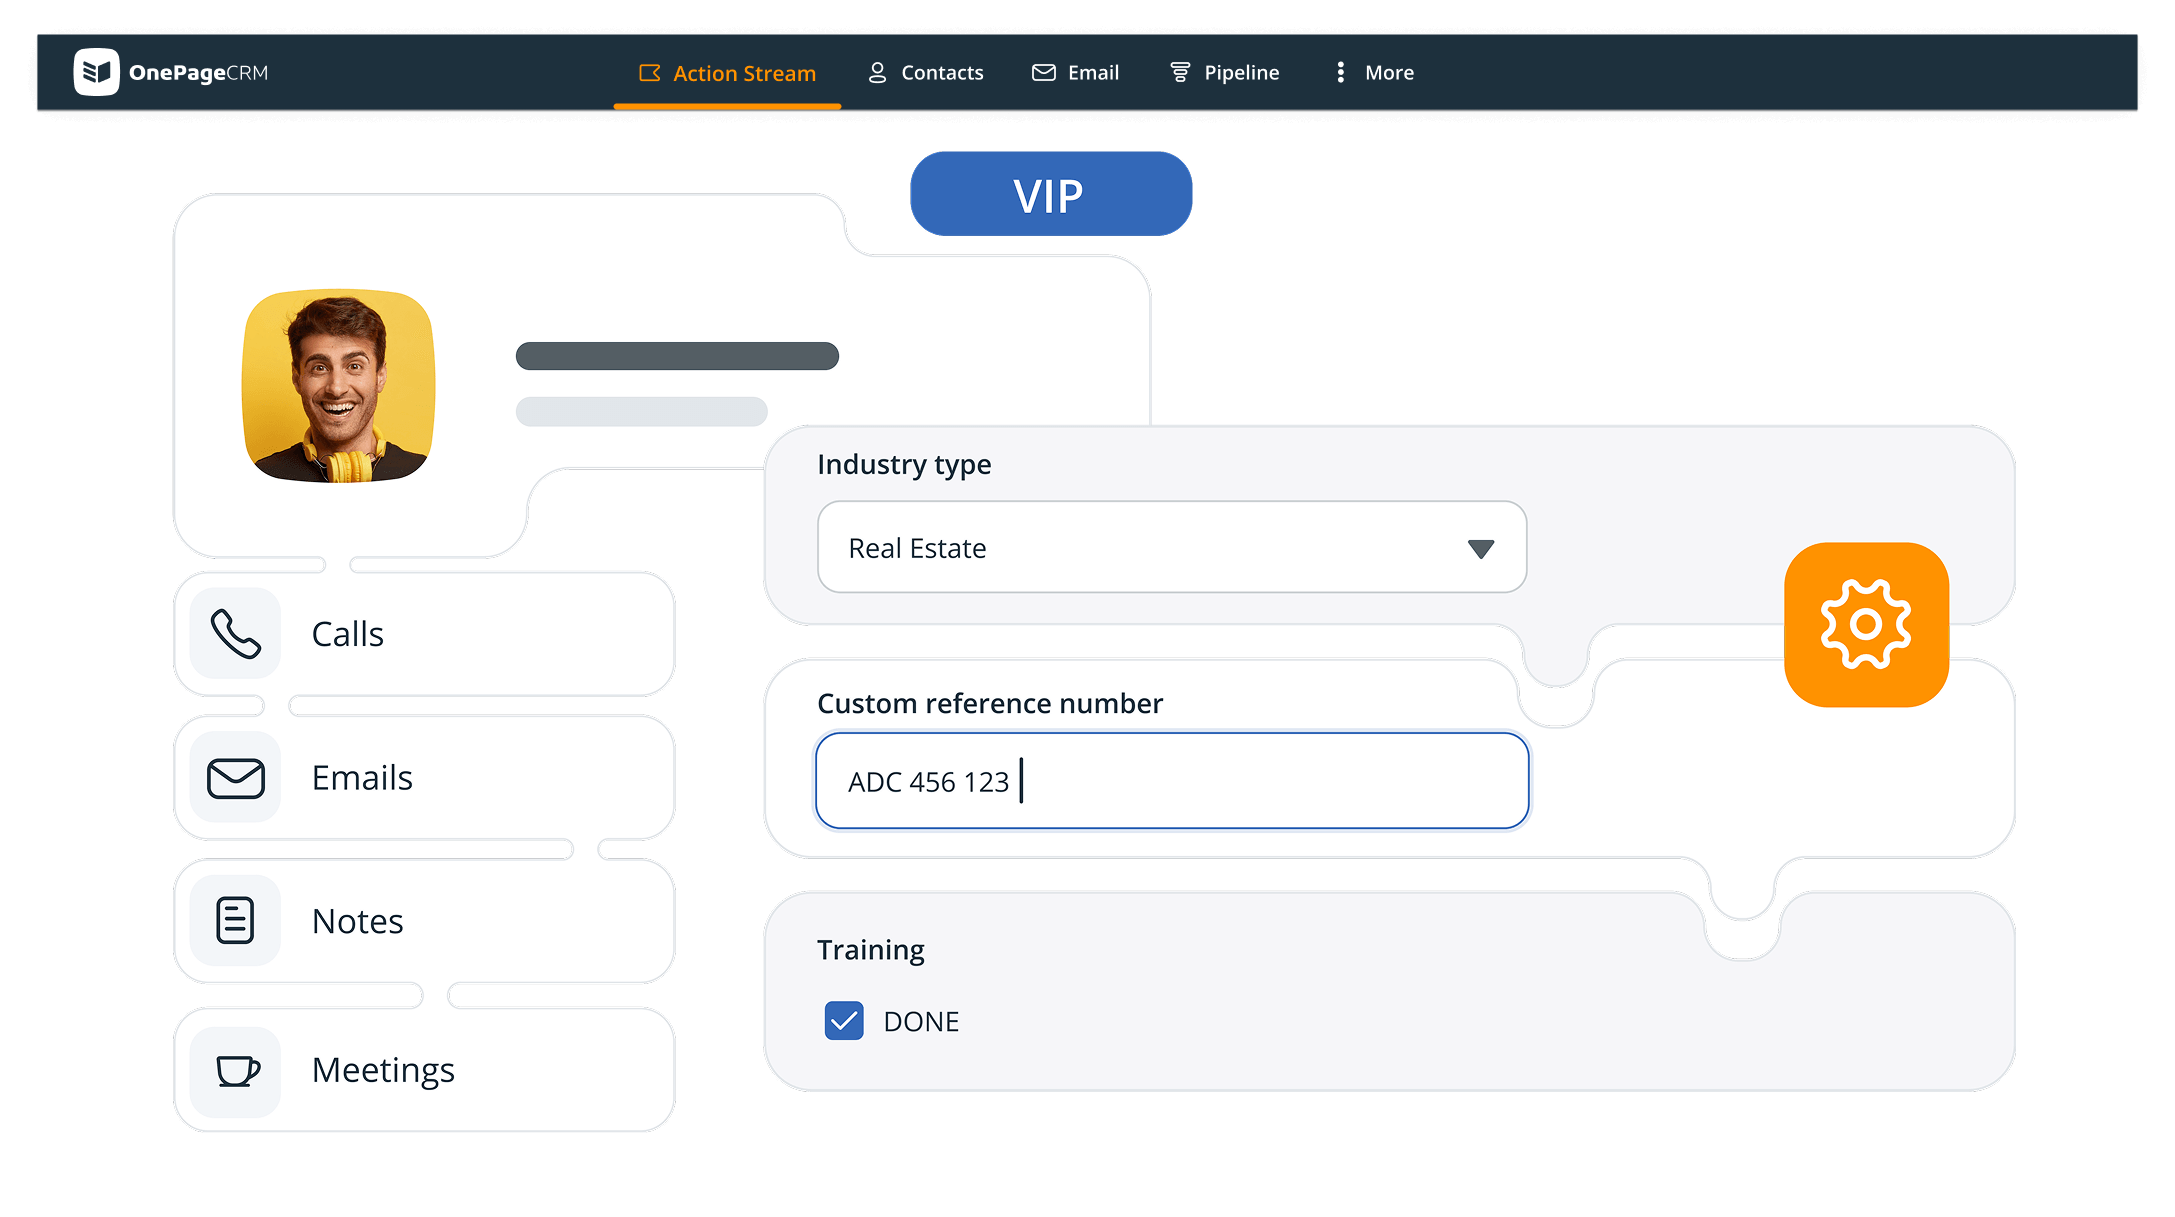
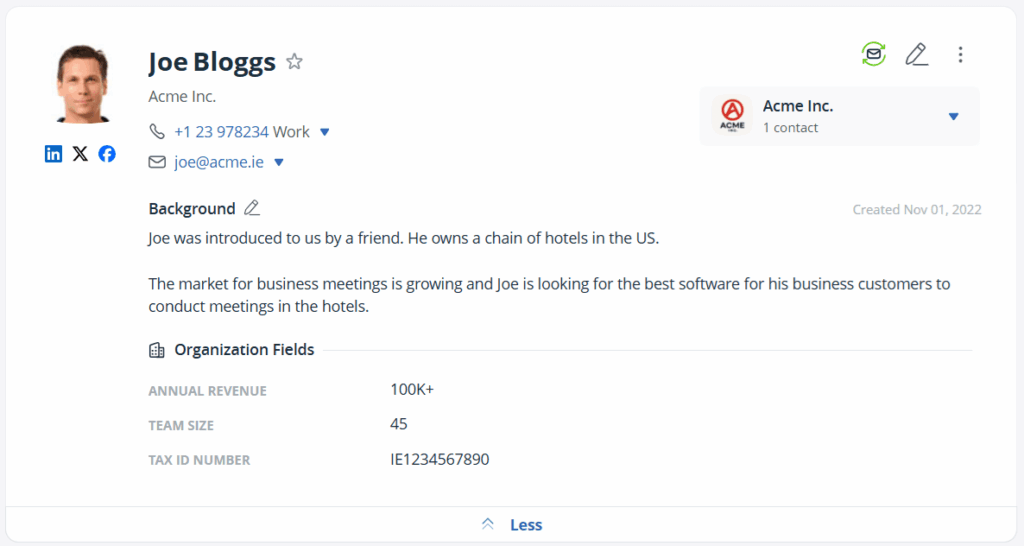
As the name suggests, these fields store contact-related information.
Here are a few examples of what you can track:
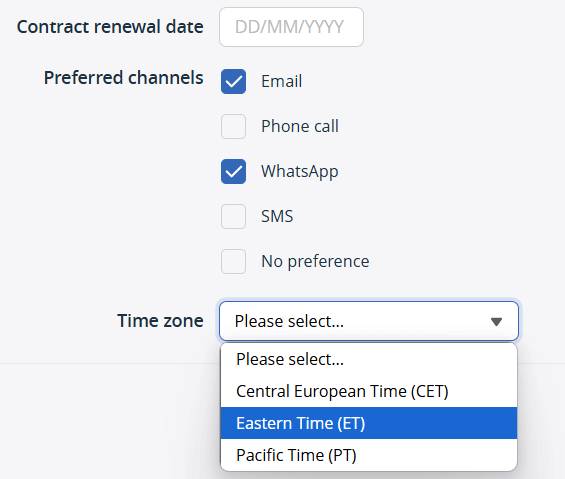
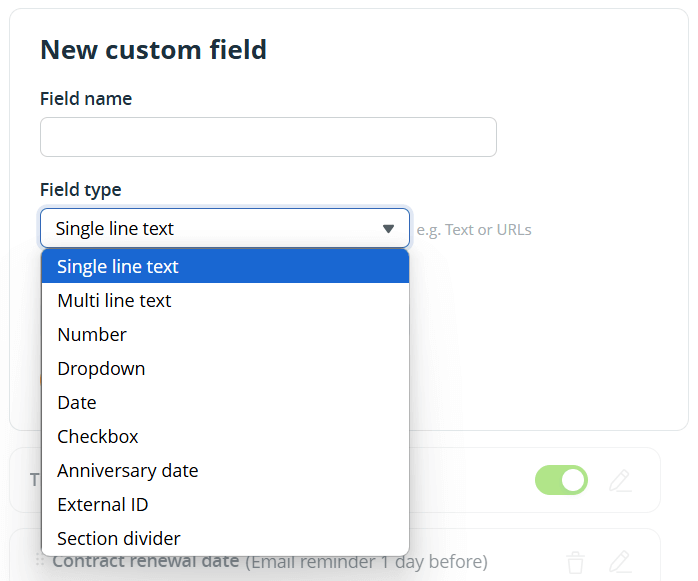
Each field can have a different data type. For example, use dates for renewals, a checkbox for channels, and a drop-down list for time zones.
By using different data types, you can organize data in a better way.
These fields capture company-wide details. They are not specific to individuals who work there, but describe the whole organization.
Common examples of such custom fields include:
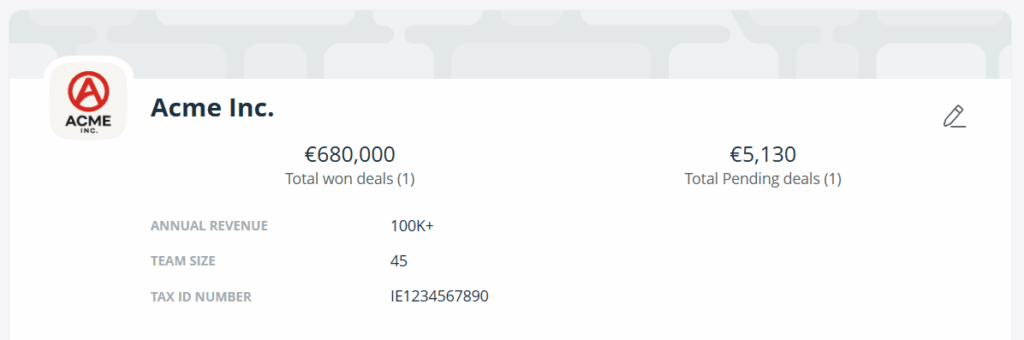
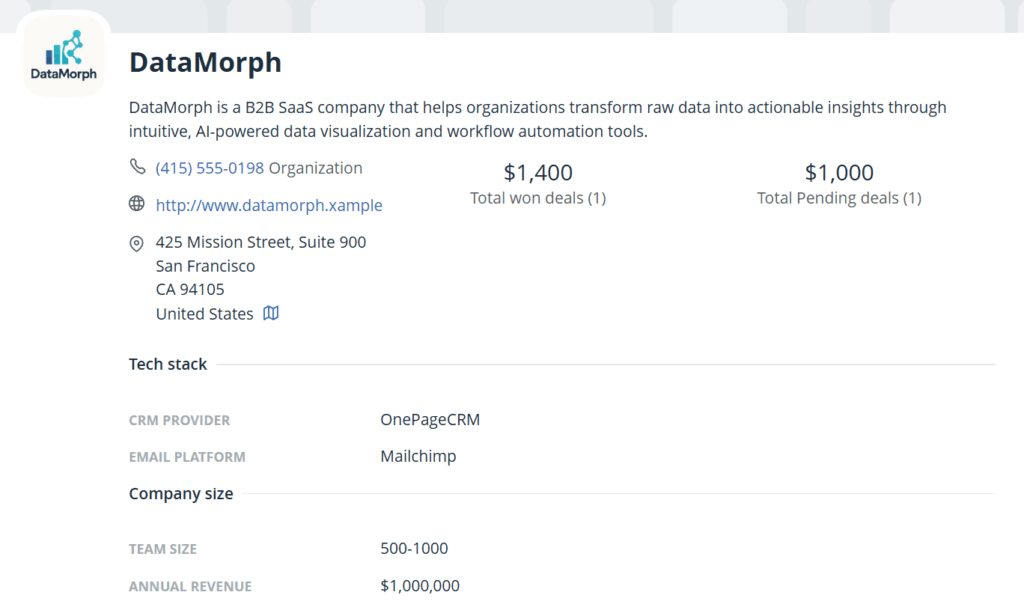
In OnePageCRM, you can display Organization fields even on the Contact page (see the screenshot below).
In this case, you’ll see company-related data without opening the Organization view.
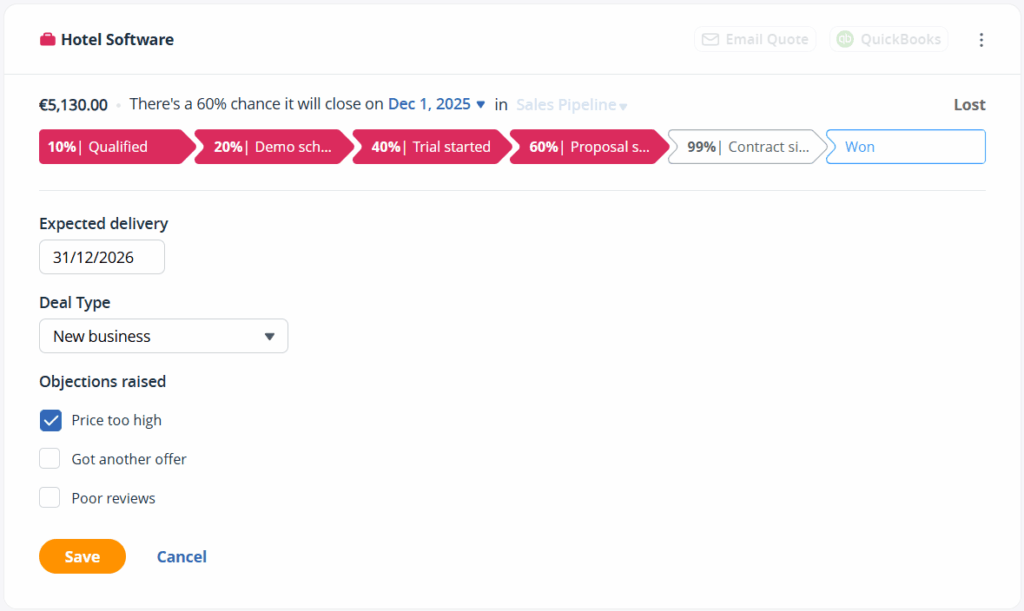
For pending Deals, you can create custom fields to mirror your sales process.
Here’s what you can track:
But that’s not it.
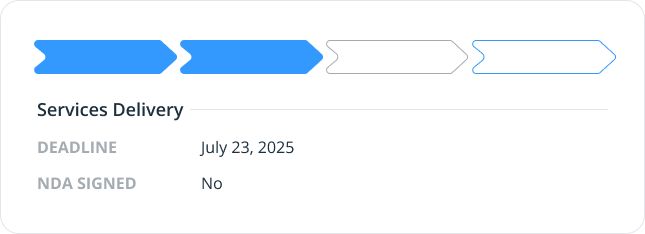
OnePageCRM also lets you track won sales deals for your post-sales operations. This is especially useful when you need a light project management tool for delivering client work (see the Delivery Pipeline feature).
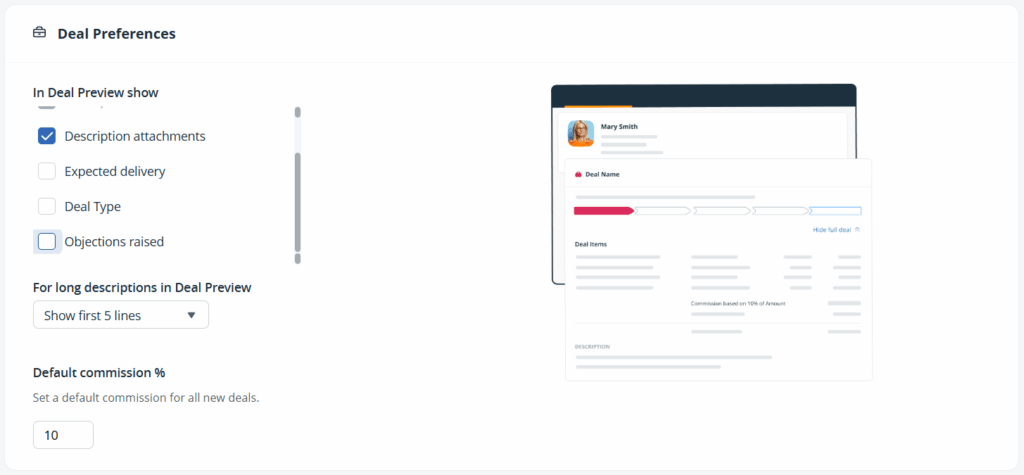
However, having multiple Custom Fields can feel overwhelming.
That’s why you can customize the Deal Preview on the Settings page and decide how much information you want to show.
You can use different data types in Custom Fields, depending on what works best in each case:
The External ID field connects OnePageCRM with other tools.
Let’s say you use OnePageCRM for sales and Mailchimp for marketing.
You can create a Mailchimp ID field inside OnePageCRM:
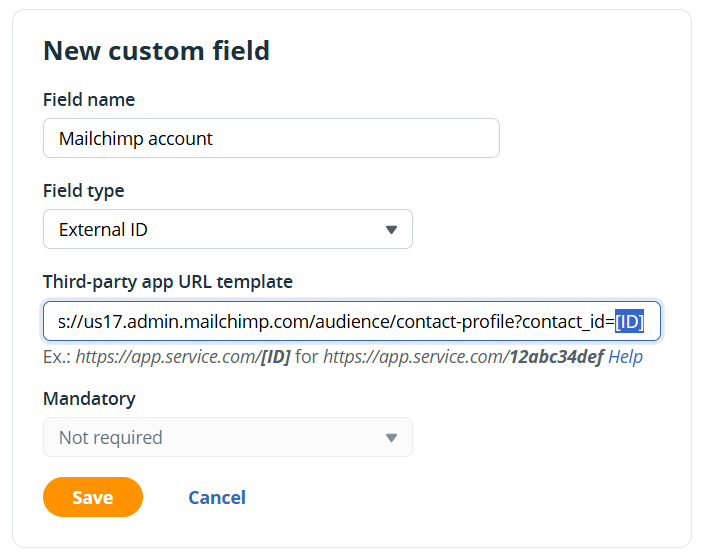
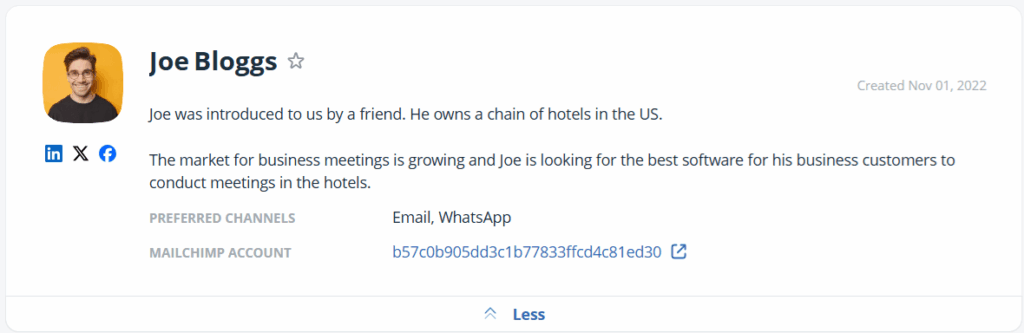
Now, that field becomes a clickable link that takes you straight to the contact’s Mailchimp profile.
The External ID Custom Field is useful if, besides OnePageCRM, you also use a custom-built solution.
For example, some OnePageCRM users sell software products. They manage customer accounts in their own software product but use OnePageCRM as their sales CRM. By using the External ID field, they can link each contact in OnePageCRM to the corresponding account in their internal system.
This makes it easy for their Customer Success, Sales, or Support teams to open the user’s account with a single click, speeding up responses.
You can use this Custom Field for any web app that stores contact data and uses a consistent URL structure. For example, accounting platforms, help desks, and so on.
In OnePageCRM, you can add an unlimited number of custom fields.
That’s why Section Dividers for Custom Fields can be very handy.
You can use them to organize Custom Fields into groups.
For example, let’s say you’re using both a Sales and a Delivery Pipeline in OnePageCRM.
In this case, you might want to record some qualification-specific data for the deals in your Sales Pipeline, such as:
Once the sales deal is won, you’ll move it to a Delivery Pipeline, where you’ll continue tracking post-sales information. It might include:
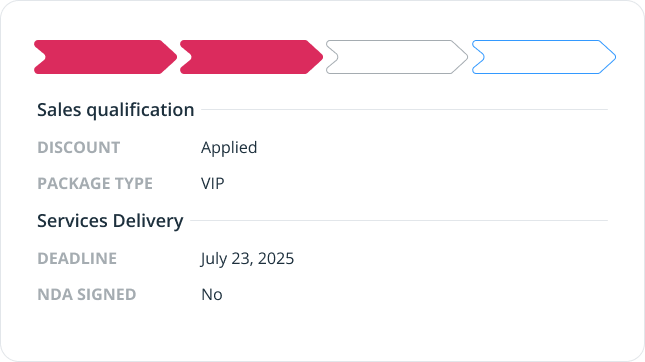
By adding Section Dividers to your Deals, you can visually differentiate between the two sets of custom fields: the ones for sales and the other ones for post-sales operations.
But that’s not it.
You can add Section Dividers to Contact and Organization Custom Fields, too.
For example, if you have both Sales and Customer Success teams using one CRM, they probably track and record different types of data.
With Section Dividers, you can easily group these custom fields by team.

If you work in B2B sales, you might want to track account-wide information.
For example, what vendors an organization is using or its company size.
In this case, Section Dividers can be helpful too.
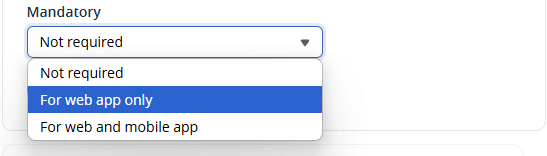
Not all Custom Fields are created equal, so you can decide on their importance:
This flexibility helps balance quality with speed.
Field sales teams can quickly add contacts on mobile without getting stuck on lengthy forms, while office staff can complete records when they have more time.
Here are a few things to keep in mind: